HAPPY VEG
  • The Happy Veggie
  • Recipes
  • Animal News
  • Bypass or Buy?
  • My Personal Blog
  • Kitchen, Veggies, and Health
  • Archives
  • VIDEOS

R E C I P E S

Tortiglioni Ragu

8/31/2022

0 Comments

 
Picture
Tortiglioni Ragu


Prep Time: 25 Min
Cook Time: 2 + Hours

Yields: 4+ Servings
Picture

WHAT YOU NEED

  • 1 Lb. Dry Tortiglioni Pasta
  • 3 Tbsp. EVOO
  • 1 Yellow Onion, diced
  • 2 stalks Celery, diced
  • 2 Carrots, peeled & diced
  • 4 cloves Garlic, crushed & minced
  • 1 Tbsp. Sundried Tomatoes, chopped
  • 1 Large / 2 Small Zucchinis (1 1/2 C) , diced
  • 340g Beyond Meat Beef
  • 2 Tbsp. Tomato Paste
  • 3/4 C White Wine
  • 1 C Passata
  • 2 C PC Brand Plant-Based Chik'n Broth
  • Handful Fresh Basil
  • 1/2 C Whipping Cream, room temp
  • 1 Tbsp. Unsalted Butter
  • 1/2 C Grana Padano, grated
  • 1 Hard Cheese Rind
  • 1 Tsp. Red Pepper Flakes
  • 1 Tsp. Dried Oregano
  • 2 Bay Leaves
  • 3/4 Tsp. + Sea Salt
  • Cracked Pepper
Picture
Picture

DIRECTIONS

  • Bring a large pot of cold, generously salted water to a boil on medium high heat. Cover until needed.
  • Begin heating the EVOO, garlic, oregano, and pepper flakes, in a large, deep skillet set to about medium heat. Once warm, let everything sizzle together for 30 seconds and then add the onion, carrot, and celery. Season with sea salt & cracked pepper, stir, and cook 5 minutes. Drop in a handful of torn basil leaves and continue to cook another minute or two. 
  • Move everything to the outskirts of the pan and drop in the Beyond beef. Break up the beef as it cooks in to smaller crumbles. Cook 5ish minutes, stirring & flipping the beef in the skillet as it cooks. Now, push the beef against the other veg on the outskirts of the pan. Add the zucchini, sundried toms, and a good pinch of salt. Let the zucchini & sundried toms cook for 2 or 3 minutes until starting to go soft.
  • Stir everything together now with the tomato paste and continue to cook another 2 minutes. Pour in the wine and let that bubble away until reduced by half. Pour in the passata & chik'n broth. Stir and wait for the sauce to come to a boil. Once boiled, add 3/4 tsp. sea salt, the bay leaves, and the hard cheese rind. Reduce the heat to medium low and simmer uncovered for an hour. Stir and let the sauce continue for another 30 minutes or more if you've got the time. Thin our with water if needed as the sauce cooks. ​
  • Pluck out the bay leaves & cheese rind from the sauce. Stir the cream in to your sauce and let that come to temperature. In the meantime, add your pasta to the boiling water & cook to al dente according to package directions. Strain the pasta directly in to the skillet with the sauce, reserving up to 1 C pasta water. Toss the noodles in the ragu until everything is nice and coated, using pasta water if needed. Turn off the heat and add the grana padano, butter, & a splash of paste water. Stir and fold everything together until nice and creamy & combined. Taste and adjust salt if desired.
  • For service, serve each portion with more grated grana and fresh herbs. ENJOY!
Picture

HAPPY VEG

0 Comments

Sausage & Gnocchi Hash Skillet

8/27/2022

0 Comments

 
Picture
Sausage & Gnocchi Hash Skillet


Prep Time: 15 Min
Cook Time: 30 - 35 Min

​Yields: 2 Servings
Picture

WHAT YOU NEED

  • EVOO
  • 2 Large, Free-Range Eggs
  • 4 Vegetarian Breakfast Links
  • 1 C Shelf Stable Gnocchi
  • 1/2 Red Onion, chopped
  • 1 1/2 Bell Peppers, chopped
  • 2 cloves Garlic, crushed & minced
  • 2 Green Onions, sliced
  • 1 Jalapeno, seeded & diced
  • PC Brand Plant-Based Chik'n Broth
  • 1/2 C Extra Old Cheddar, shredded
  • 1 Tsp. Mexican Chili Powder
  • 1/2 Tsp. Garlic Powder
  • 1/2 Tsp. Onion Powder
  • 1/2 Tsp. Tex Mex Seasoning
  • 1/4 Tsp. Cajun Seasoning Blend
  • 1/2 Tsp. Red Pepper Flakes
  • Sea Salt & Cracked Pep
  • GARNISHES - Fresh Cilantro, Sliced Jalapeno, Pea Shoots, Green Onion, Red Onion
Picture

DIRECTIONS

  • Begin heating some EVOO in a skillet set to about medium. Cook the breakfast links according to package directions, making sure to get them nice and seared on all sides. Transfer the sausages to a paper towel lined plate.
  • Add a little more EVOO to the skillet if needed before adding the garlic & pepper flakes. Stir and cook up to 30 seconds without browning. Add the onion, bell pepper, jalapeno, green onions, and a good pinch of sea salt & cracked pepper. Stir and cook 6 - 7 minutes. Make a well in the center of the pan and drop in the chili powder, garlic powder, onion powder, Tex Mex, & Cajun seasoning. Let the spices toast for up to a minute or until they're nice and fragrant. Stir everything together and continue to cook another 2 minutes.​
  • Add a good splash of chik'n broth and the dry gnocchi. Season with sea salt, stir, and cook another 5 - 7 minutes. Take a gnocchi out and cut into it to check if it is tender and ready to eat. If not, continue cooking until tender, adding another splash of chik'n broth if needed.
  • Slice the sausages on an angle and return them to the skillet. Continue to stir and cook until sausages are warmed through. Stir in the cheddar until melted and gooey. Taste and adjust salt if desired.
  • In a small stainless pan, heat some EVOO on just below medium heat. Once heated, crack in the eggs and season them with sea salt, pepper, and pepper flakes. Cook until whites are set. Spoon hot oil on to whites to cook them faster and keep that yolk runny.
  • For service, divide the skillet between two dishes and top with a fried egg. Now, top with some of my recommended garnishes & ENJOY!
Picture
Picture
Picture

HAPPY VEG

0 Comments

5 Cheese Broccoli Rice Casserole

8/24/2022

0 Comments

 
Picture
5 Cheese Broccoli Rice Casserole


Prep Time: 30 Min
Cook Time: 50 - 60 Min

Yields: 8 Slices

WHAT YOU NEED

SAUCE

  • 1/4 C Unsalted Butter
  • 1 Yellow Onion, diced
  • 1 Red Bell Pepper, diced
  • 3 cloves Garlic, crushed & minced
  • 3 Tbsp. AP Flour
  • 1 C 2% Milk, room temp
  • 1 C Whipping Cream, room temp
  • 1/2 Tsp. Red Pepper Flakes
  • 1 Tsp. Dry Mustard Powder
  • 1/2 Tsp. Garlic Powder
  • 1/2 Tsp. + Sea Salt
  • Cracked Pepper To Taste

OTHERS

  • 2 C Cooked Brown Rice
  • 5 C Broccoli Florets
  • 540ml can White Beans, drained & rinsed
  • 1 1/2 C Extra Old White Cheddar, shredded
  • 1 1/2 C Pizza Mozzarella, shredded
  • 1/2 C Gouda, shredded
  • 1/4 C Full Fat Cream Cheese, room temp
  • 1/4 C Grana Padano, shredded
  • Crackers of Choice - Vegetable Thins, Ritz, Saltines etc.
  • 2 Tbsp. Unsalted Butter, melted
  • Fresh Parsley, chopped - GARNISH
Picture
Picture

DIRECTIONS

  • Bring a large pot of salted water to a boil on medium high heat. Add the broccoli florets and let them cook 2- 3 minutes until nice & bright green. Strain and set aside.
  • Preheat oven to 350 F
  • SAUCE - Begin melting the butter together with the pepper flakes & garlic in a medium sized pot set to about medium heat. Once heated, let the garlic sizzle for 30 seconds before adding the onion, pepper, and a good pinch of salt. Cook 5 - 6 minutes or until veggies have cooked down nicely. Stir in the flour and let that continue to cook another minute or two to cook out raw flour flavour. Pour in 1/3 of the milk & cream, stirring to combine everything. Then, continue to slowly pour in the remainder of the milk and cream, stirring as you pour. Bring the sauce to a boil & stir in the garlic powder, mustard powder, salt, and desired amount of cracked pepper. Reduce the heat to medium low and simmer until nice and thick, 5 - 7 minutes. Turn off the heat and fold in the cheddar, mozz, grana, gouda, and cream cheese, reserving 1/2 C each of the mozz & cheddar for the top. 
  • To a large mixing bowl, add your cooked rice, blanched broccoli, and white beans. Pour the cheesy sauce over everything and stir until everything is thoroughly combined. Taste and adjust salt / pepper if desired.
  • Take a handful of your favourite crackers and place them in a ziploc. Use a rolling pin to smash them up for crumbs until nice and crumbly.​
  • Transfer the creamy rice to a 9"x14" baking dish sprayed with cooked spray. Spread it out to make an even layer and top with the reserved cheddar / mozz. Sprinkle the cracker crumbs over to form the top layer and drizzle the top with the 2 Tbsp. melted butter. Season the top with sea salt & cracked pepper.
  • Bake 35 - 40 minutes until bubbly and delicious. If desired, switch the oven to BROIL 500 F for a minute or two for some additional golden brown action on the top.
  • Remove from oven and let cool 10 - 15 minutes before slicing and serving. I suggest cutting the casserole in to 8 equal sized pieces. Garnish each serving with fresh herbs and additional grana padano. ENJOY
Picture
Picture

HAPPY VEG

0 Comments

Mexican Street Corn Mac & Cheese

8/21/2022

0 Comments

 
Picture
Mexican Street Corn Mac & Cheese


Prep Time: 15 Min
Cook Time: 45 Min


Picture

WHAT YOU NEED

  • 2 C Dry Macaroni Noodles
  • 2 Cobs Fresh Corn
  • 3 Jalapenos (11/2 sliced in to thin rounds, 1 1/2 seeded & diced)
  • 1 1/4 C Whipping Cream
  • 3 Large Free-Range Eggs
  • 1/4 C Unsalted Butter, melted & cooled
  • 1 C Extra Old Marble Cheddar, shredded
  • 1 C Vintage White Cheddar, shredded
  • 1/2 C Feta Cheese, crumbled
  • 1/4 C Grana Padano, grated
  • 1 Tsp. Garlic Powder
  • 1 1/2 Tsp. Tajin
  • 1/2 Tsp. Cayenne Powder
  • 1 Tsp. Dry Mustard Powder
  • 1/2 Tsp. Sea Salt
  • GARNISHES - Sour Cream, Crumbled Feta, Tajin, Grana Padano, Lime Zest, Green Onions, Cilantro, Hot Sauce
Picture

DIRECTIONS

  • Preheat oven to 350 F
  • Whisk together the cream, eggs, cooled butter, garlic powder, tajin, mustard, cayenne, and salt. Set aside and prepare everything else.
  • Bring a large pot of cold, generously slated water to a boil on medium high heat. Once boiled, add the macaroni and cook a minute less than al dente. Turn off the burner and strain the noodles. Return the noodles to the pan over the burner that is off but still warm. Pour in the cream mixture and stir to combine. Next, fold in the corn, diced jalapeno, and 2/3 of the cheese, stirring until cheese has mostly melted.
  • Transfer the mac to a 9"13" baking dish (9"x14" would also work) that has been sprayed with cooking spray. Sprinkle the reserved cheese & some additional Tajin over top and arrange the sliced jalapenos over the mac.​
  • Bake uncovered for 35 minutes until bubbly and golden brown on top. If desired, switch the oven to BROIL 500 F for a couple minutes for additional crusty action.
  • Remove and let cool 5 - 10 minutes before slicing the dish in to 6 or 8 equal sized squares.
  • Garnish each serving with some or all of the recommended garnishes. I strongly suggest using the sour cream, grana, Tajin, and lime zest for that street corn vibe. ENJOY!
Picture
Picture

HAPPY VEG

0 Comments

Pinto Bean & Corn Queso Jacket Potatoes

8/17/2022

0 Comments

 
Picture
Pinto Bean & Corn Queso
Jacket Potatoes


Prep Time: 20 Min
Cook Time: 1 Hour +


Yields: 4 Potatoes
Picture

WHAT YOU NEED

  • 4 Russet Potatoes
  • 540ml Mexican Pinto Beans (*1)
  • 1/4 C Unsalted Butter
  • 2 cloves Garlic, crushed & minced
  • 2 Jalapeno Peppers, seeded & diced
  • 1/2 Red Onion
  • 2 Cobs Fresh Corn, stripped from cob
  • 4 Green Onions, divided light & dark portions
  • 1 C Whipping Cream, room temp
  • 1 C Monterey Jack with jalapenos, shredded
  • 1 Tsp. Red Pepper Flakes
  • 1/2 C Grana Padano, shredded
  • Sea Salt & Cracked Pepper
  • Garnishes - Tajin, Green Onions, Diced Red onion, Fresh Cilantro, Sour Cream, Crumbled Feta, Sliced Jalapeno
Picture
Picture

WHAT YOU NEED

  • Preheat oven to 425 F. Pierce the potatoes in several spots using a fork and place them on a baking sheet. Drizzle them with vegetable oil and season them liberally with sea salt and cracked pepper. Bake for 1 Hour +, flipping halfway until potatoes are crispy on the outside and cooked thoroughly.
  • Empty the contents of the pinto beans in to a small pot and cover. Cook on low until potatoes are ready.
  • With about 15 minutes left in the potatoes, start the corn queso. Begin melting the butter together with the diced jalapeno, garlic, and pepper flakes, in a skillet set to about medium heat. Once heated, let everything sizzle for about a minute before adding the diced red onion and light portions of the green onion. Season with salt and cook 5 - 6 minutes. Add the corn and another pinch of salt & continue to cook another 4 minutes, stirring often.
  • Pour in the cream and wait for the sauce to boil. Once boiled, season with salt, reduce the heat to medium low, and simmer uncovered until reduced and thickened, about 5 - 6 minutes. Turn off the heat and stir in the monterey jack & grana padano. Taste and adjust salt if desired.
  • For service, slice open your potatoes and add some butter to each one. Ladle over some of the pinto beans followed by a generous spoon of the corn queso. Garnish with some or all of the recommended toppings (*2) and ENJOY!
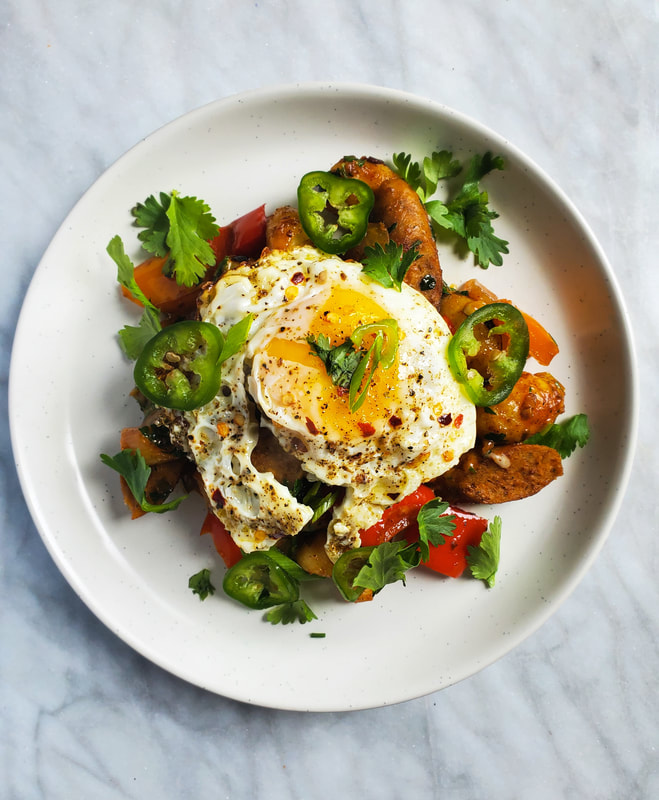
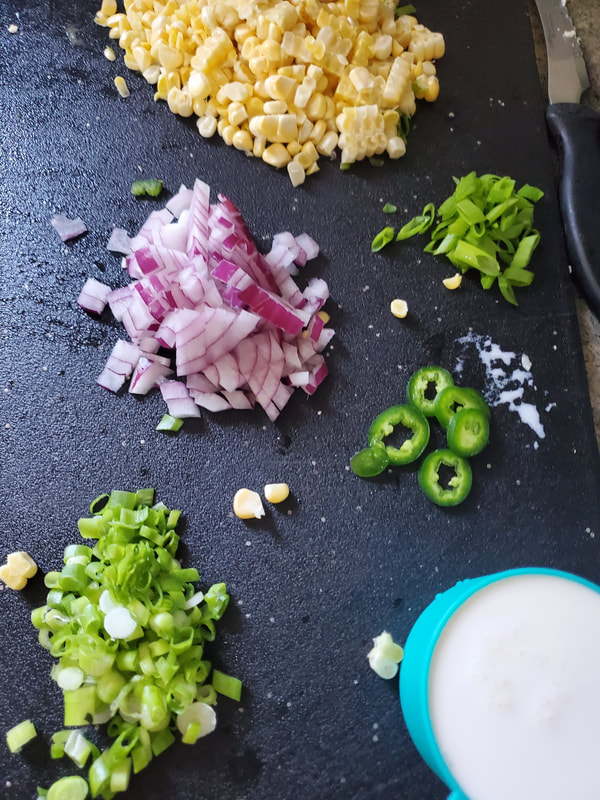
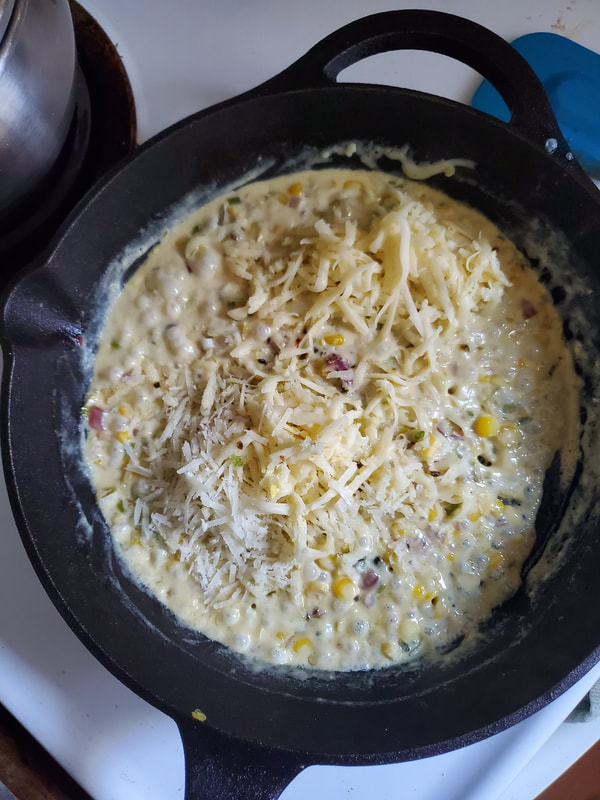
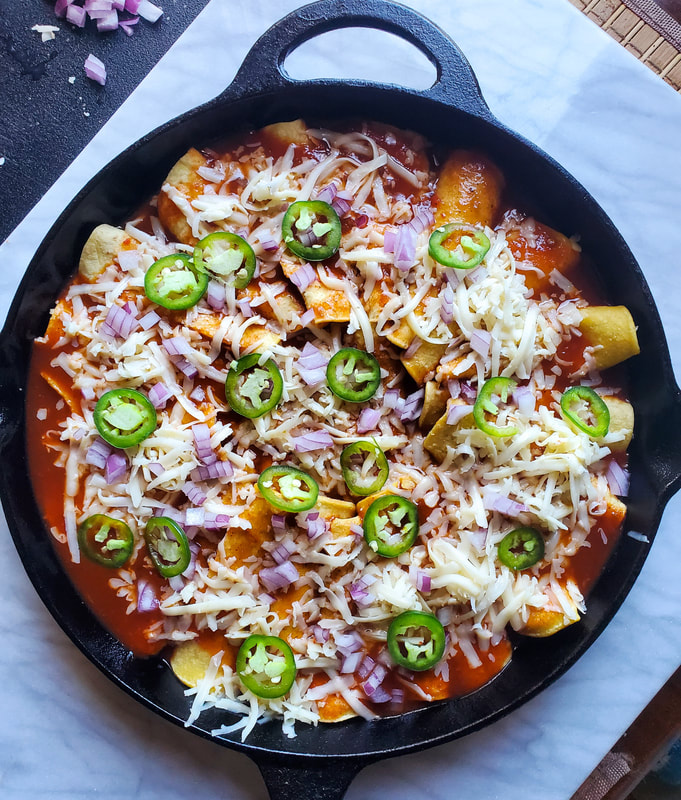
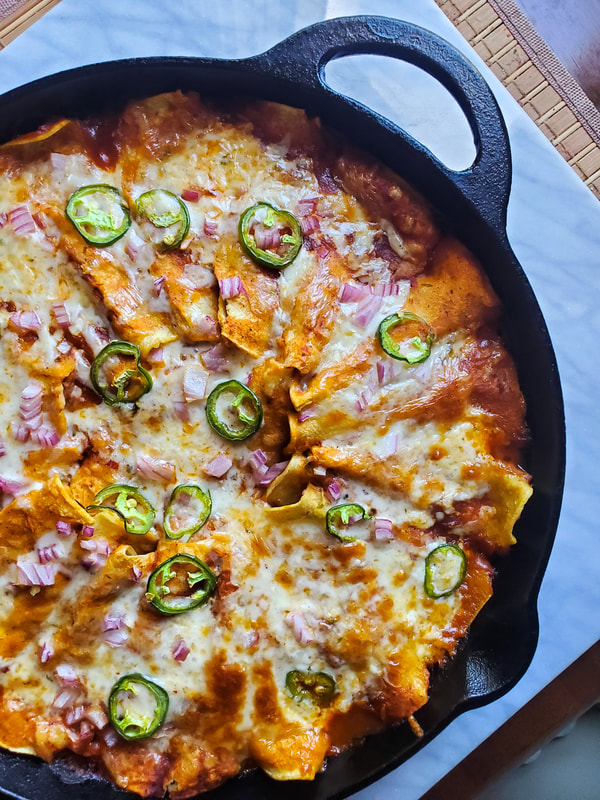
NOTES:
(*1) I used the La Costena brand of Pinto beans which come seasoned. If you can't find a seasoned variety, consider seasoning it yourself with a Mexican spice blend.
(*2) For the garnishes, I recommend the Tajin spice, diced red onion, reserved green onion, and cilantro. At the very least, make sure to use the Tajin spice, it's magic with the queso.
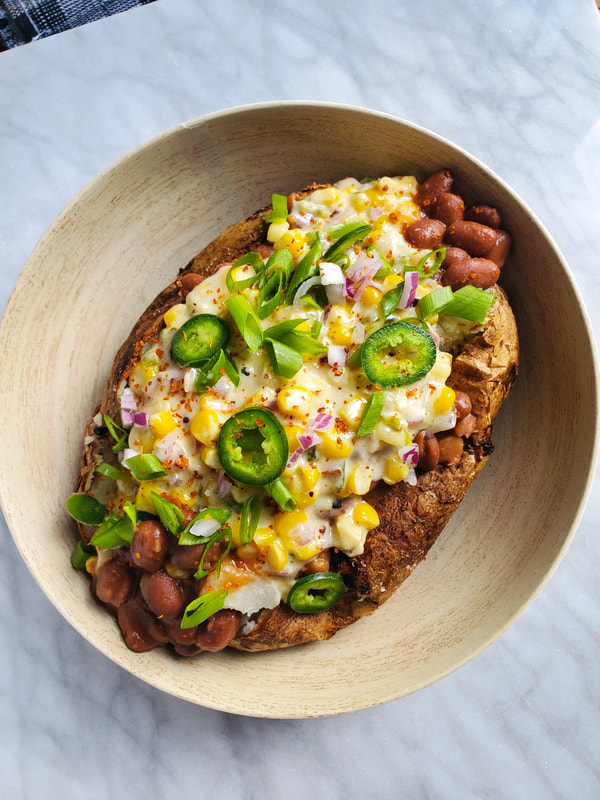
Picture

HAPPY VEG

0 Comments

Mom's White Bean & Spinach Mozza Sketti Skillet

8/15/2022

0 Comments

 
Picture
Mom's White Bean & Spinach Mozza Sketti Skillet


Prep Time: 20 Min
Cook Time: 35 - 40 Min

Yields: 4 Servings
Picture

WHAT YOU NEED

  • 3 Tbsp. EVOO
  • 1 Tbsp. Pepperoncini in Oil
  • 5 cloves Garlic, crushed & minced
  • 1 Yellow Onion, diced
  • 2 Bell Peppers, diced
  • 227g Button Mushrooms, quartered
  • 340g Impossible Foods Beef
  • 1/2 540ml can White Beans, drained & rinsed
  • 3 C Fresh Baby Spinach
  • 1 Tbsp. Tomato Paste
  • 1 Tbsp. Sundried Tomato Pesto (optional)
  • 796ml San Marzano Tomatoes
  • 1/2 C White Wine
  • 1 C PC Brand Plant-Based Chik'n Broth
  • 2 C Broken Spaghetti (Approx. 8 oz)
  • 1 1/2 C Pizza Mozzarella, shredded
  • 1/4 C Grana Padano, shredded
  • Handful Fresh Basil, divided
  • 1 Hard Cheese Rind
  • 1 Tsp. Italian Seasoning
  • 1 Tsp. Garlic Powder
  • 1/2 Tsp. Onion Powder
  • 1/2 Tsp. + Sea Salt
Picture

DIRECTIONS

  • Begin heating the EVOO, pepperoncini, garlic, and Italian seasoning in a large skillet (at least 12") set to about medium heat. Once heated, let everything sizzle for about a minute and tear in some fresh basil. Let the basil cook for 30 seconds before adding the onion, pepper, and a good pinch of salt. Cook for 5 minutes, add the creminis and another good pinch of salt, and cook until mushrooms have released their liquid and cooked down, about 5 more minutes.
  • Move the veggies to the outer edge of the skillet and drop in the Impossible Beef. Break up the beef in to smaller crumbles as it cooks until it's crumbly and browned. Add the tomato paste & sundried tom pesto, stirring everything together and letting it continue to cook another minute.​
  • Pour in the wine and simmer until mostly reduced. Now, we can add everything else. Pour in the tomatoes and break them up in the skillet. Next, add the spinach, white beans, broken spaghetti, and cheese rind. Stir and bring to a boil. Once boiled, reduce the heat to medium low and stir in the garlic powder, onion powder, and 1/2 tsp. sea salt. Cover and simmer 15 - 20 minutes until spaghetti is tender and veggies are cooked.
  • Pluck out the cheese rind and turn off the heat. Fold in the mozzarella, grana padano, and some additional fresh basil until melty and delicious. Taste and adjust salt if desired.
  • Serve garnished with additional grana padano and fresh herbs like parsley & basil. ENJOY!
Picture

HAPPY VEG

0 Comments

Zucchini, Lemon, & Basil Fettuccine

8/12/2022

0 Comments

 
Picture
Zucchini, Lemon, & Basil Fettuccine


Prep Time: 15 Min
Cook Time: 15 - 20 Min

Yields: 4 Servings
Picture

WHAT YOU NEED

  • 12oz Dry Fettuccine Pasta (*1)
  • 1/3 C EVOO
  • 2 1/2 Zucchinis (1/2 Zucc sliced in to thin rounds, the other two are grated on the larger grate & have the liquid squeezed out of them using a cheese cloth)
  • 3 cloves Garlic, crushed & minced
  • 1/2 Yellow Onion, finely diced
  • Handful Fresh Basil. divided
  • 1/3 C Grana Padano, grated
  • 1 Lemon, zested & juiced
  • 1/2 Tsp. + Red Pepper Flakes
  • Sea Salt & Cracked Pepper
  • Pea Shoots, Lemon Zest - Garnish
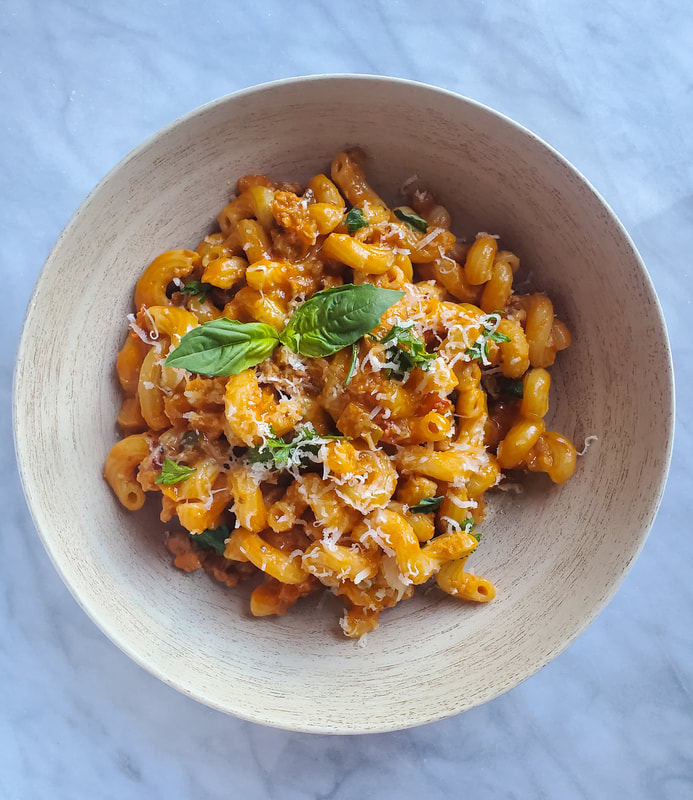
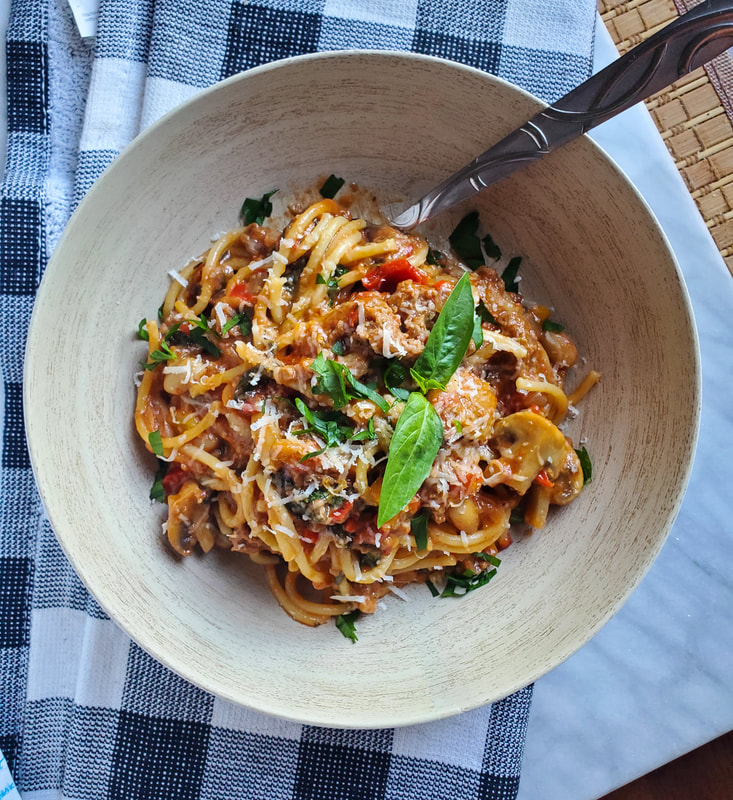
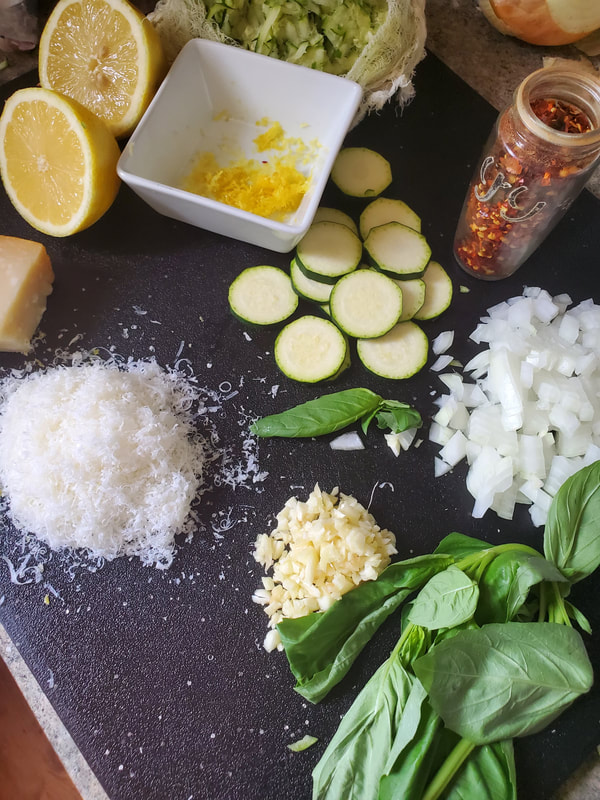
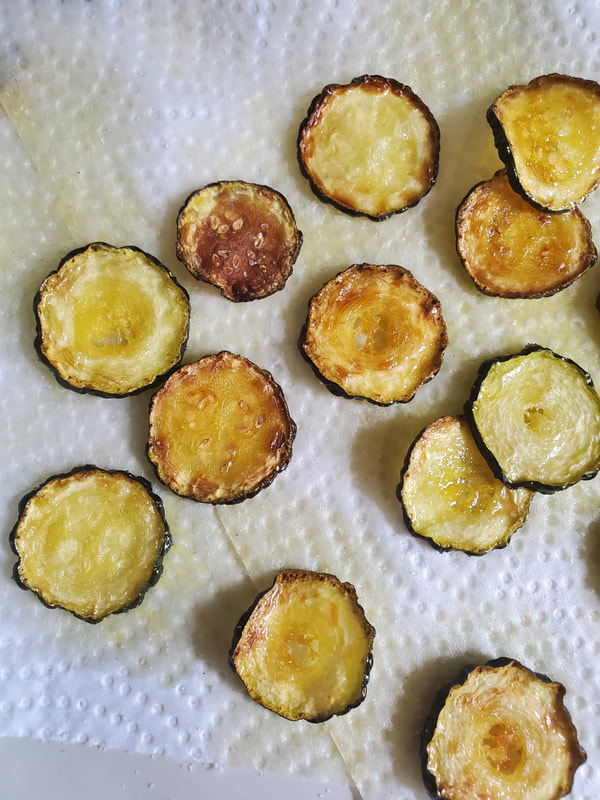
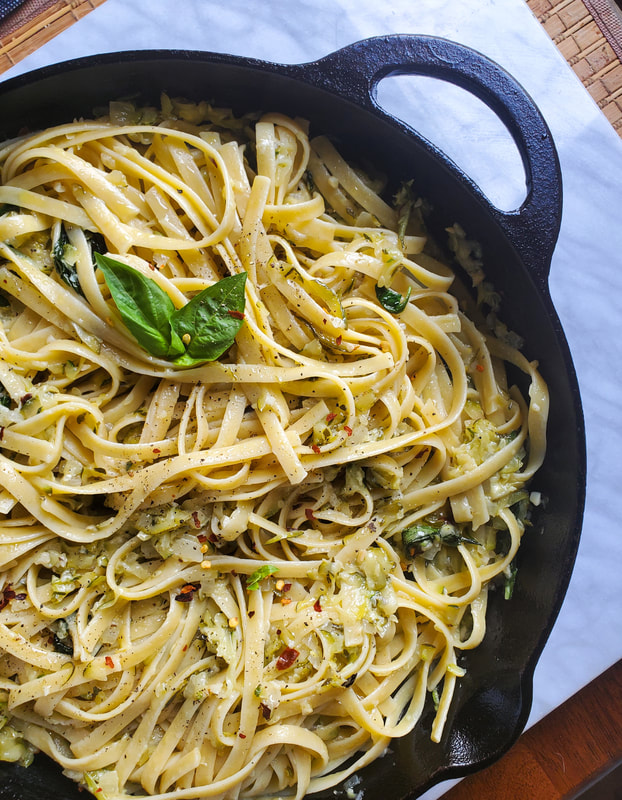
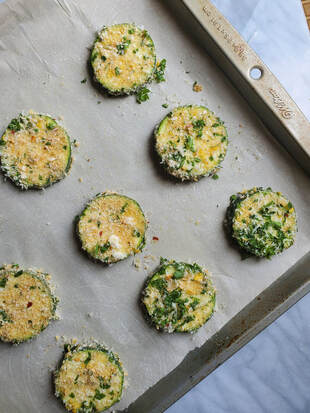
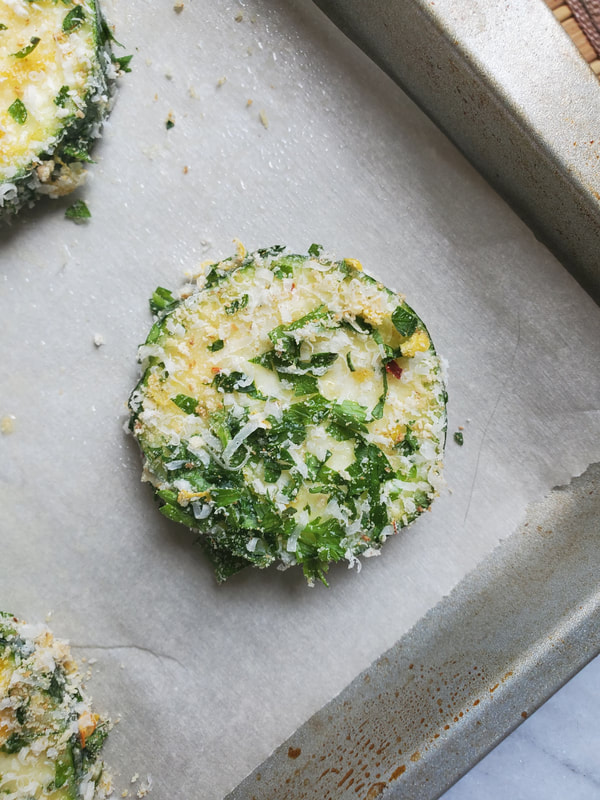
NOTES:
(*1) A standard serving of pasta is 2 ounces. I rarely find that to be enough so I added an additional ounce per serving. If you choose to go with 8 ounces instead, you'll simply have more zucchini to go around. Make sure to reduce the amount of pasta water you're using to avoid a swampy mess.
Picture
Picture

DIRECTIONS

  • Bring a large pot of cold, heavily slated water to a boil on medium high heat. Once boiled, add the fettuccine & cook to al dente. If the "sauce" is not yet ready, leave the pasta in a colander and reserve all of the pasta water.
  • In a large skillet, begin heating the EVOO on about medium heat. Once heated, add the slices of zucchini and fry them until golden brown on both sides. Transfer the rounds to a paper towel lined plate and immediately it them with salt.
  • Reduce the heat to medium low before adding the garlic & pepper flakes to the same skillet, this will prevent scorching the garlic. Stir and gradually increase the heat back to where it was as the garlic and pep flakes sizzle. Add the onions and a good pinch of salt. let the onions go for about 4 - 5 minutes. Tear a few basil leaves in to the skillet and let them cook for about 30 seconds. Add the shredded zuccs, a good pinch of salt, and some pasta water to help cook down the zuccs. Cook 6 - 7 minutes, adding pasta water as needed to keep things simmering. Stir in the lemon juice and add the cooked fettuccine to the skillet. Toss the pasta with the cooked zuccs over the heat and continue to toss as the starches release in to the skillet. Turn off the heat and fold in the grana padano, lemon zest, more pasta water to help emulsify, desired amount of cracked pepper, and some more fresh basil torn up. Toss until glossy, adding pasta water if needed to keep things smooth and creamy. Taste and add additional salt if desired.
  • For service, serve up each portion with some additional grated grana padano, optional lemon zest, and top with a few of the crispy zucc rounds and some pea shoots. ENJOY!
Picture

HAPPY VEG

0 Comments

Mini Red Enchilada Skillet

8/10/2022

0 Comments

 
Picture
Mini Red Enchilada Skillet


Prep Time: 15 Min
Cook Time: 40 - 45 Min

Yields: 20 Enchiladas / 4 - 5 Servings
Picture

WHAT YOU NEED

  • 20 x Corn Street Taco Shells
  • 2 x 215ml Red Enchilada Sauce
  • 1/2 C PC Brand Plant-Based Chik'n Broth
  • 2 Tsp. Valentina Hot Sauce
  • 398ml Refried Beans
  • 1 Tsp. Tajin
  • 1 1/2 C Monterey Jack with Jalapenos, shredded
  • 1/4 Large Red Onion, finely diced
  • 1 Jalapeno, thinly sliced
  • Garnishes - Sour Cream, Green Onions, Crumbled Feta, Fresh Cilantro, Lime, Salsa Verde, Sliced Jalapenos, Tajin, Valentina Hot Sauce
Picture

DIRECTIONS

  • Add the refried beans & tajin seasoning to a small, covered pot set to medium low. Once heated, reduce to low and leave covered.
  • Add the enchilada sauce, chikn broth, and hot sauce to a small pot set to about medium. Once bubbling, reduce heat to medium low and simmer for 6 - 7 minutes.
  • In the meantime, preheat the oven to 375 F. Wrap the tortillas in tinfoil in two separate batches and place them in to the oven as it warms up. Flip after a few minutes and remove them when the tortillas are warm and malleable. Keep one stack wrapped as you assemble the first stack.​
  • Ladle enough enchilada sauce to coat the bottom of a 12" skillet. Next, take the shells and smear about 1 tbsp. refried beans in the center followed by 1 Tbsp. of the shredded cheese. Roll them up and place them seam side down in the skillet. Build a circle around the skillet as you continue to assemble enchiladas. You will likely need to put a couple in the center of the skillet to fill in the empty space.
  • Pour the remaining sauce over the enchiladas, followed by sprinkling over the remaining Monterey jack. Top with sliced jalapenos & diced red onions.
  • Cover and bake 15 minutes. Remove cover and continue to bake another 15 minutes until cheese is melted.
  • Remove skillet from the oven and set on to a wire cooling rack. Let them sit 5 - 10 minutes prior to serving. Serve each portion with some or all of the recommended garnishes. ENJOY!
Picture

HAPPY VEG

0 Comments

Dill Pickle Pasta Salad

8/7/2022

0 Comments

 
Picture
Dill Pickle
Pasta Salad


Prep Time: 15 Min
Cook Time: 15 Min


Picture

WHAT YOU NEED

  • 1 Lb. Dry Shell Pasta (*1)
  • 1/2 Red Onion, finely diced
  • 1 Heaping Cup Extra Old Marble Cheddar, cut in to 1/2" cubes (*2)
  • 2 C Garlic & Dill Pickles, chopped (*3)
  • 3/4 C Mayonnaise
  • 1/3 C Sour Cream
  • 1 Tbsp. Chipotle Mayonnaise
  • EVOO
  • 3 Tbsp. Pickle Juice
  • 2 Tbsp. Fresh Dill, chopped
  • 1/4 Tsp. Red Pepper Flakes
  • 1/4 Tsp. + Sea Salt
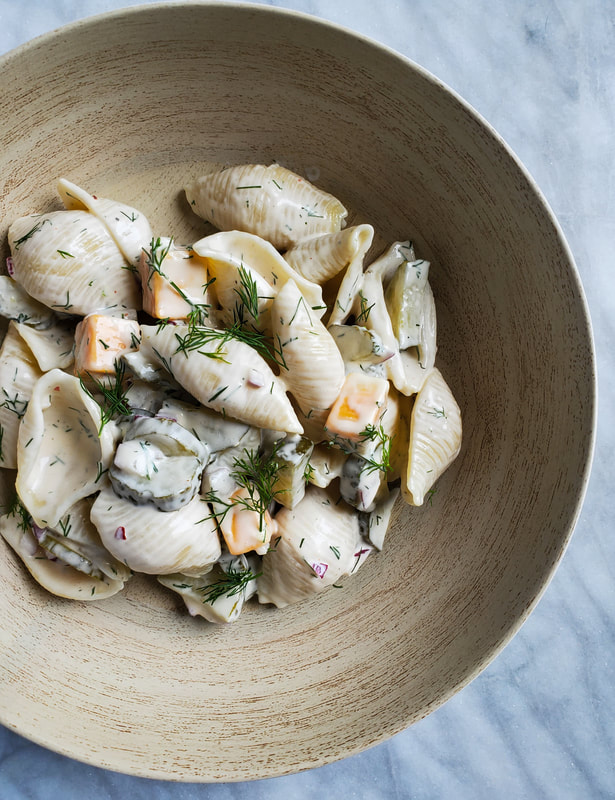
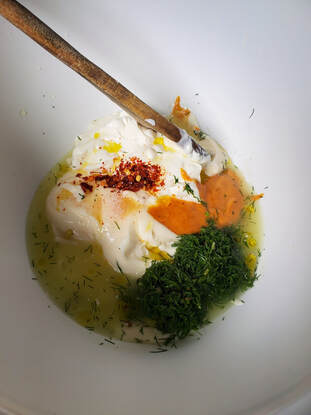
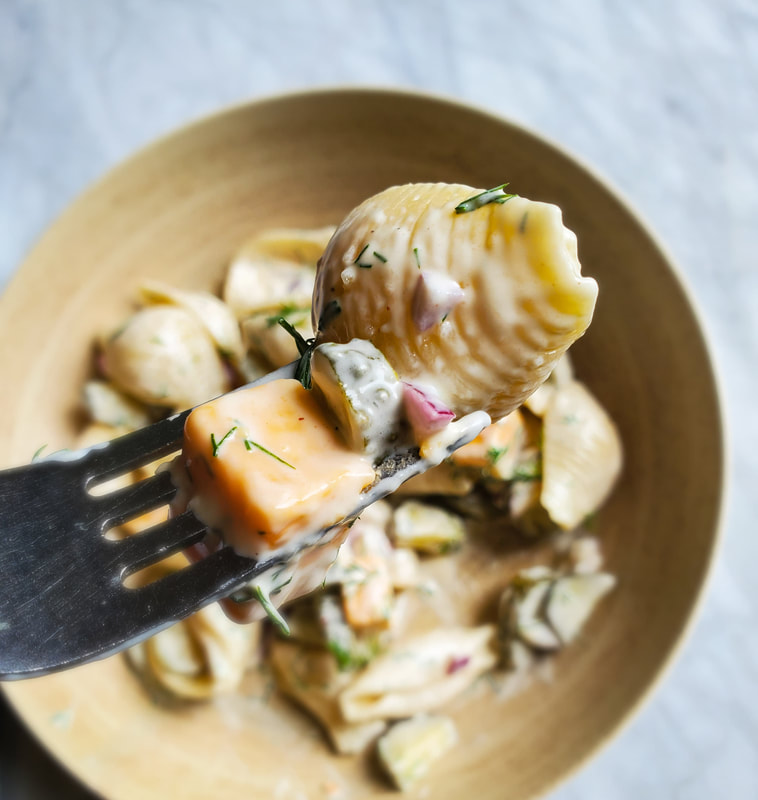
NOTES:

(*1) - There are quite a few different sizes of shells available. Typically, you'll find the largest ones that we would use for stuffed shells, the medium sized ones like I've used, and the smaller sized shells. I suggest the medium size because it pairs well with the clunkier cubes of cheddar & pickles. If you can't find them, go for the smaller ones.

(*2) - I used extra old marble because I had it on hand. Any old cheddar will work but make sure it's been aged and has the pungent flavour. It's the perfect contrast to the pickles.

(*3) -  For me, the only pickle to use for this recipe is garlicky dills. If needed, regular dills would work as well. I wouldn't recommend gherkins because they're not sour enough, nor would I recommend sweet and sour pickles simply because the flavours wouldn't meld.
Picture

DIRECTIONS

  • Bring a large pot of cold, salted water to a boil on medium high heat. Once boiled, add the shells and cook them to al dente. Strain and rinse with cool water until no longer steaming.
  • In the meantime, whisk together the mayo, chip mayo, sour cream, pickle juice, a drizzle of EVOO, pepper flakes, dill, and salt in a medium sized mixing bowl. Set aside while pasta cooks / cools.
  • To the mixing bowl with the dressing, add the cooked pasta, pickles, red onions, & marble cheddar. Stir until everything is combined. Cover and refrigerate for at least 30 minutes. At this point, taste and add additional salt if desired.
  • Serve garnished with additional fresh dill. ENJOY!
Picture

HAPPY VEG

0 Comments

Crispy Grana Padano Zucchinis

8/5/2022

1 Comment

 
Picture
Crispy Grana Zucchinis


​Prep Time: 15 Min
Cook Time: 15 - 20 Min

Yields: 20 - 24 Pieces
Picture

WHAT YOU NEED

  • 2 Zucchinis
  • 1 Large Free Range Egg
  • 1/4 C Grana Padano, grated
  • 1/4 C Italian Seasoned Breadcrumbs
  • 1 Lemon, zested
  • 1/2 Tsp. Red Pepper Flakes
  • 1 Tbsp. Fresh Parsley, finely chopped
  • Sea Salt & Cracked Pepper
  • Cooking Spray
  • RECOMMENDED DIPS - Marinara, Chipotle Mayo, Lime Aioli
Picture

DIRECTIONS

  • Preheat oven to 425 F
  • Stir together the breadcrumbs, grana padano, lemon zest, pepper flakes, parsley, and a good pinch of salt & pepper. Set aside.
  • Whisk together the egg with a splash of water in a small bowl. Set aside.
  • Slice the zucchinis in to about 1/4" rounds. You should end up with anywhere from 10 - 12 slices per zucc. Dip the zuccs in to the egg mix followed by dropping them in to the crumb mixture, pressing down to coat them entirely. Transfer breaded zuccs to a parchment lined baking sheet that has been sprayed with cooking spray. Continue until all slices have been breaded. 
  • Spray the zuccs with cooking spray and hit the tray with a good pinch of salt.​
  • Bake for 10 minutes, flip, and continue for another 5 - 7 until crispy and golden brown.
  • Remove the zuccs from the oven and give them one last pinch of sea salt. Transfer to a serving plate and enjoy right away for best results. The zuccs will not stay crispy for long.
  • Serve with your favourite dip. I recommend marinara or chipotle mayo. ENJOY!
Picture
Picture

HAPPY VEG

1 Comment
<<Previous

    Archives

    December 2025
    November 2025
    October 2025
    September 2025
    August 2025
    July 2025
    June 2025
    May 2025
    April 2025
    March 2025
    February 2025
    January 2025
    December 2024
    November 2024
    October 2024
    September 2024
    August 2024
    July 2024
    June 2024
    May 2024
    April 2024
    March 2024
    February 2024
    January 2024
    December 2023
    November 2023
    October 2023
    September 2023
    August 2023
    July 2023
    June 2023
    May 2023
    April 2023
    March 2023
    February 2023
    January 2023
    December 2022
    November 2022
    October 2022
    September 2022
    August 2022
    July 2022
    June 2022
    May 2022
    April 2022
    March 2022
    February 2022
    January 2022
    December 2021
    November 2021
    October 2021
    September 2021
    August 2021
    July 2021
    June 2021
    May 2021
    April 2021
    March 2021
    February 2021
    January 2021
    December 2020
    November 2020
    October 2020
    September 2020
    August 2020
    July 2020
    June 2020
    May 2020
    April 2020
    March 2020
    February 2020
    January 2020
    December 2019
    November 2019
    October 2019
    November 2018
    October 2018
    September 2018
    August 2018
    July 2018
    June 2018
    May 2018
    April 2018
    March 2018
    February 2018
    January 2018
    December 2017
    November 2017
    October 2017
    September 2017
    August 2017
    July 2017
    June 2017
    May 2017
    April 2017
    March 2017
    February 2017
    January 2017
    December 2016
    November 2016
    October 2016
    September 2016
    August 2016
    July 2016
    June 2016
    May 2016
    April 2016
    March 2016
    February 2016
    January 2016
    December 2015
    November 2015
    October 2015
    September 2015
    August 2015
    July 2015
    June 2015
    May 2015
    April 2015
    March 2015
    February 2015
    January 2015
    December 2014
    November 2014

    Jonathan - Happy Veg

    Recipes that everyone in the house will love, guaranteed.

    Categories

    All

Proudly powered by Weebly
Photos from Marcus Bichel Lindegaard, JeepersMedia, regan76, Kjokkenutstyr.net, Muffet, wuestenigel
  • The Happy Veggie
  • Recipes
  • Animal News
  • Bypass or Buy?
  • My Personal Blog
  • Kitchen, Veggies, and Health
  • Archives
  • VIDEOS